It’s been nearly a year since Google launched its latest Chromecast, the one that introduced us to a new Google TV interface and created a schism with the hundreds of Android TV devices we’d seen to date. A low price and a good experience made this new Chromecast one of the most no-brainer purchases for many Android lovers, and even more non-techies.
It’s easy to follow Google’s recommendations and use this Chromecast as the company intended, but if you want to make the most of it, we’ve got a series of power-user tips just for you.
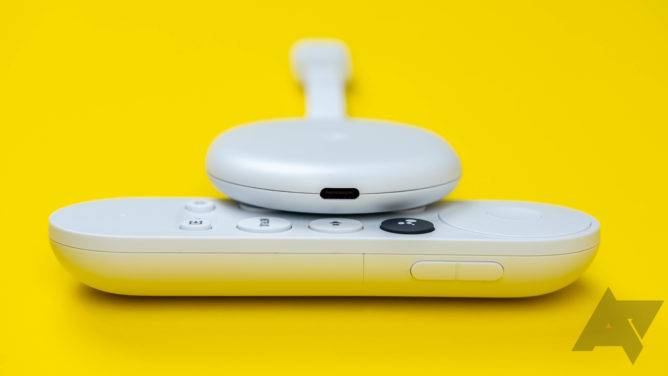
Access the Google Play Store
Google wants you to use Assistant and the Apps tab in the new Google TV interface to download new apps and games on your Chromecast. The full Play Store is still loaded, but there’s no user-facing icon to launch it. So if you want to force update some apps, switch user accounts, or stop auto-updates, you’ll have to figure out a way to get to that Play Store.
The simplest one is to launch Assistant and say “Play Store.” But we’ve covered four other methods in this article.

This is the fastest way, but there are others.
Remap the remote’s buttons
Button Mapper is one of my favorite apps on any Android TV because it allows me to control what each remote button does. There are buttons I don’t touch (the D-pad for example), but others can be customized to do whatever you want. Whether you prefer another streaming service instead of Netflix, or you’d like some shortcuts to open your favorite apps, you can assign this functionality to single, double, and long presses on some of the remote's buttons.
But don’t get too carried away as not all buttons are created equal on that remote and it’s better if you know what you’re getting into before you start messing around. That’s why I created a table for you to see which buttons and functionalities are the most safely customizable, along with a full tutorial here.

Remapping the TV Input button to open the Play Store and Solid Explorer.
Take screenshots
Once you’ve become familiar with Button Mapper, you can assign a shortcut to take a screenshot on your Chromecast. I usually go for a long press on the Home button. This is perfect for sharing your latest gaming achievements or a moment from the show or movie you’re watching — or sending tips to Android Police. We use it a lot too on the team, that’s how all the screenshots in this post and in my Android TV tutorials and reviews are taken.
You can see the detailed step-by-step instructions here.

Remapping the Home button to take a screenshot.
Sideload APKs
One day or another, you’ll need to sideload an app to your Chromecast. Whether you’re forcing an update to a preloaded app that hasn’t reached you yet or you’re installing an unofficial app (it’s a legit use case, but beware!), you need to be able to send an APK to your TV then install it. You’d think this is straightforward, but it isn’t.
You need a third-party app to send files to your TV, then you have to enable developer options and change a setting on your Chromecast to allow the installation of apps from unknown sources, and finally can you install that APK. We have the full tutorial for you here.

Installing the Google Photos APK through APK Mirror.
Get a third-party app launcher
If you ever sideload some unofficial apps on your Chromecast, you’ll need a way to launch them that doesn’t involve digging in Settings to find them. Enter third-party app launchers, which don’t fully replace the Google TV launcher, but act like any other installed app. Open them and you’ll find a list of the other apps on your TV, whether they’re official or not.
You’ll find several third-party launchers, but the two I keep going back to are Sideload Launcher (even though it hasn’t been updated in years), and SideApps.
Install Google Photos
Odds are you don’t need to install Google Photos on your Chromecast, or any Android TV for that matter. But if you fall in the super duper limited category of people who need to offload screenshots from their dongle as quickly and effortlessly as possible, or those who want to browse the full-res version of their pics directly on the Chromecast without casting, then you need to install the proper Google Photos app.

The Google Photos app running on the Chromecast.
The process isn’t for the faint of heart and requires many, many painful steps, which are made easier if you have a USB or Bluetooth mouse, but it’s relatively worth it because in the end, you’ll have Google Photos on your Chromecast. And from then on, any screenshot you take will be immediately backed up to your Google account and accessible from the web or other phones and tablets. Check the step-by-step guide here.
Control the volume from your phone
Google decided to complicate things when it comes to volume control on the Chromecast. The remote’s volume buttons can be assigned to either control the TV’s volume or the Chromecast’s. If you pick the former, you won’t be able to change the volume of cast content from your phone, so you’ll have to reach for the physical remote after casting YouTube or Spotify or any other media to lower or raise the volume. That’s why we recommend you switch to the latter choice, which keeps that functionality, but alas, you’ll have to surrender the option to listen with surround sound.
It’s not an easy pick, but we’ve got the full explanation for you here.

This is the setting to change, but it comes with a few compromises.
Use the new Android remote
Google recently sunset the standalone Android TV remove app on Android and introduced a new functionality that’s built into Android and its Quick Settings. Compared to the previous implementation, you get power and volume controls (only if you enabled them in the previous tip), a more modern design, and a more responsive app.
At this point, the feature should have rolled out to everyone, but if you don’t have it or if you don’t know how to enable it, we’ve got just the tutorial for you.
The new Google TV remote experience.
Plug a USB-C hub
The Chromecast is a pretty straightforward piece of tech, but its USB-C port allows you to augment it in ways you didn’t imagine you could. If you hook it up to a USB-C hub with pass-through charging (to make sure you can still power it up), you can try adding various USB accessories. A camera allows you to use Google Duo, a keyboard or a mouse let you control the Chromecast the old-school way, a USB flash drive can serve as extra storage, and so on.
With these nine tips, you should be ready to take your entire experience to a whole new level on the Chromecast with Google TV. Whether you're just looking for a quick way to launch the Play Store or you need to completely customize your remote, take screenshots, and back them up to Google Photos, you should have everything you need here.